Showing posts with label Emergency Preparedness. Show all posts

Tuesday, September 17, 2013

72-hour kit: Radio


In case of a natural disaster or other emergency in your area, the only way to get information may be through a radio.

There are many different types of radios, from battery-powered to hand-crack radios. Whichever you prefer, make sure you know how to use it and have extra batteries if necessary.


This is step 7 on the PLAN 9 pamphlet put together by the Southwest Utah Public Health Department.

Tuesday, June 11, 2013

72-hour kit: Can opener

Photo courtesy of Wikipedia Commons.
 
 
As far as 72-hour kits go, I try not to pack any food that requires a can opener, so I personally do not need a can opener in my kit.

However, I think that it is VERY important to have an extra can opener available in your home. So much of what we store is canned food, so it seems only practical to have an extra opener around...maybe even two...or three.

Last year, our can opener died. The gear thing bent and it was toast...and it was Sunday...and I was in the middle of making dinner...and I needed a can of pineapple.

So off to the neighbors I went. It only took 4 doors until I found one. It was totally embarrassing.

The next day we went out and bought TWO can openers.
 
Today I am back down to ONE...and it's not even one of the two I bought last year. I need to add a can opener to my next shopping list for sure.


This is step 6 on the PLAN 9 pamphlet put together by the Southwest Utah Public Health Department.

See right side of blog for additional steps.

Tuesday, May 14, 2013

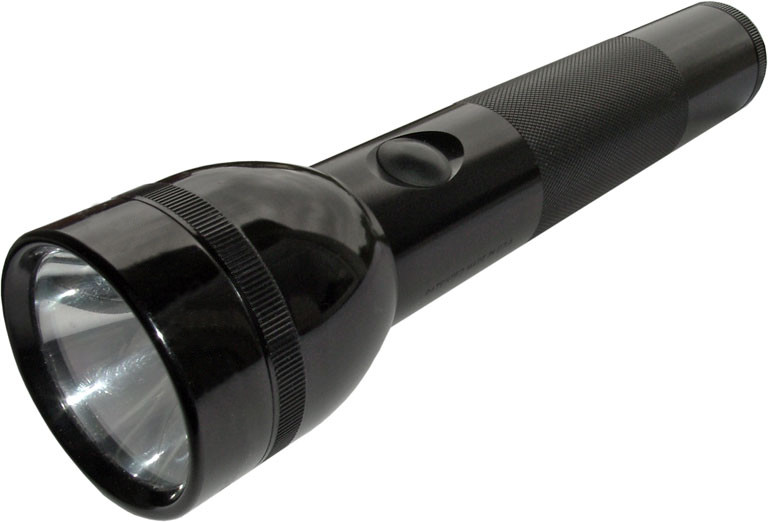
72-hour kit: Flashlights


Photo courtesy of Wikipedia Commons.

 
Every 72-hour kit should include a flashlight AND batteries.

Do not keep the batteries in the flashlight while it is being stored.

Having head-lamp type flashlights are a great idea considering you may have your hands full in an emergency.
 
A flashlight in your car is also very important, as well has having one or two around the house in case of a power-outage. For Christmas we received a cool flashlight that charges in a power outlet. It's small and the kids love to use it when they want to search for something under the couch or something. And I love it because they aren't wasting batteries. I think I need to get more of these, at least one for each level of the house.


This is step 5 on the PLAN 9 pamphlet put together by the Southwest Utah Public Health Department.


See right side of blog for additional steps.

Tuesday, April 23, 2013

Family Emergency Plan: Contact Cards

No one really likes to think about this kind of stuff, but ask yourself this:

How will you contact your family members in case of an emergency?

During the day, you might be at work, your spouse might be at work, your kids at school, etc. If you can't use your cell phone or if it is dead, do you know the numbers for your spouse's work or your kid's school?

FEMA suggests that you made a contact card for each family member which includes home, work, cell phone numbers as well as doctor's information and emergency contact numbers. Adults can store these cards in their wallets or purses. (Sometimes we take for granted that we have everyone's numbers in our cell phones, but if your phone battery dies and you can't charge it, you will want this contact information.) You can place cards in your school-aged child's backpack.

Click HERE for a printable PDF with contact card information as well as a brief family plan created by FEMA.

Click HERE for a printable PDF for a child's contact card created by FEMA.

Tuesday, April 16, 2013

Family Emergency Plan

So, you have your 72-hour kits all ready? (Maybe) Now what?

At my house lately, my 4-year old and 6-year old keep trying to sneak into their kits to eat their food. It has made me realize that we haven't talked about a Family Emergency Plan for a while.

Here are some tips:

Decide what kind of disasters could happen in your area?

You don't have to get too creative, just think of the basics: Fire, flood, earthquake, chemical spill (if you live near a major highway or interstate), etc.

If you live somewhere that is prone to flooding, look into purchasing flood insurance. Remember, homeowners insurance does not cover flooding.

This can be an important fact, especially in determining where you would meet the rest of your family or if you would need to stay home. For example, if your house is on fire, you would want a meeting place in your neighborhood. If there is a community-wide issue where they call for evacuation, you may have a different meeting place.

Create a basic emergency plan and discuss it as a family.

Click HERE for a printable PDF with a brief family plan created by FEMA as well as contact card information.

Microsoft also has a template (click HERE) you can download to fill out information on your family emergency plan.

Each of these templates ask you to record basic contact information, information on each family member, medical information. The Microsoft template also has an area to record insurance policy information and information on your family meeting places.


Where would you go if you needed to evacuate? And how would you get there is the main route was not an option?

I like to keep my gas tank at least half full all the time...partially so I don't have to fork out so much cash at one time, but MOSTLY because in case of an emergency or an evacuation, I can get somewhere without having to get gas. I am lucky enough to have parents who live about 3 hours south of me, which gives me somewhere close to travel to if my town was evacuated. I could also go 4 hours north to my brother. I have thought of this many times. What I don't know is how I would get to either place if the interstate was closed.


Check with for information on emergency procedures at places your family spends the most time, such as school, work, daycare, church, and extra-curricular activities like sports.

Get involved in your community.
Check with your community to see if there is a local emergency plan in place. For example, some communities have a Reverse 911 system where you can be contacted by text in case of an emergency. Some schools may also have a similar program in place. (After the shooting at the school in Connecticut, our kids' elementary school had those who wanted to participate to give their cell phone numbers to the principal who set it up so that he can send us a mass text in case of an emergency at the school.)


Some other things you might want to think of...

Smoke alarms and fire extinguishers.
Taking a CPR class or certification.
Making an Emergency Binder and copies to keep out of town.
Inventory of belongings, either video taped or written.


For more information:

Tuesday, January 22, 2013

Why I Prepare

In the last few years, it seems that more and more people around me have become interested in food storage and emergency preparedness. Being LDS, I have heard Church leaders counsel for years about being prepared. In fact, since the late 1800s, after the Mormons settled Utah, they were advised by their leaders to store food. Back then, it wasn't really necessary to remind people to be self-reliant because for the most part they had to farm or ranch to make their own living.

It is easy for you and I to go to the grocery store and grab a can of fruit any time. We can see, however, examples of why this may not always be the case.

So these are some of MY reasons for being prepared:

1. It's what the Lord wants me to do. I believe that the leaders of my church, specifically the President of the Church who were believe to be the Lord's prophet on the Earth, are called of God and that their counsel and advise is from a loving Heavenly Father who only wants the best for me.

2. Natural disasters. We have seen examples of this time and again with hurricanes, earthquakes and more. We can learn from these experiences that it CAN happen to us and there are things we can do to be more prepared for these disasters.

3. Economic hardship. Over the last few years, we have all seen so many of our friends and family members without sufficient work. When I think of those around me that have lost jobs, I can see that the ones that had savings and food storage have had a more positive outlook, and have been able to get through the hard time without a lot of outside help. I have seen others who have had to completely rely on government or church assistance and help from family members. (I am NOT saying that any of these things are bad. There is a time and a place for each of them. I do believe, however, that we feel better about ourselves when we can be more self-reliant. I think that when parents are the primary providers for their own families, they take more satisfaction in what they have.)

4. Convenience. This one might sound funny at first, but I have found that having a few extra items at home in case of an emergency has been helpful when I have times when I do not want to run to the store. I love being able to ask my kids to go grab another ketchup out of the storage room and simply making a note that I need another one, rather than rushing to the store or bothering neighbors. I understand, however, that it takes time and money to reach the point where you feel it's convenient. When you're just getting started, it can feel anything BUT convenient. Just keep working at it!!

5. Peace of mind.  Along with convenience, once you have a little bit of food and money set aside, there is a peace that comes. Being prepared helps you feel like you can still have control in a situation that may be out of your control.


Whatever YOUR reasons, remember them as you get frustrated and annoyed. Understand that you can't have everything stored right away, just work at it little by little. Talk to your kids about it. Help them to take responsibility for the things they have so that they can grow to be more self-reliant individuals.

Most of all, keep it simple! You can do it!

Tuesday, November 13, 2012

Water


Water is ESSENTIAL no matter what your level of preparedness.

It is recommended to have one gallon of water, per person, per day, for drinking and sanitation purposes.

Don't stress. Start small.

It is recommended to store a 2 weeks supply of water. That's 14 gallons per person.

I have two weeks worth in food-grade, 5 gallon jugs like the one below. This is our drinking supply. For my washing water, I refill soft drink and juice bottles with water. I also refill old laundry soap and hand soap containers. Making a habit of refilling these bottles will make it easy to increase your water supply without a lot of extra thought and expense.

With my water storage, I separate what is stored for home use and what I would need if we had to leave home. I have a pack of water bottles in the car. I also have a small, rolling suitcase filled with water bottles in my hall closet. It's heavy but I could fit it in the car or roll it behind me, depending on which mode of transportation I would be using in an emergency.

A light addition for your 72-hour kits could be a water purifier bottle. It may not be realistic to have 3 gallons of water in each person's kit if you have to leave your car and go somewhere on foot.


Important: Keep water containers away from heat sources and direct sunlight. Do not store plastic on cement.

Here's a great link to FEMA for more information: Water

Recent post from PreparedLDSFamily: How to Store Emergency Drinking Water

And LDS.org: Drinking Water Guidelines


This is step 1 on the PLAN 9 pamphlet put together by the Southwest Utah Public Health Department.

Wednesday, October 17, 2012

72-hour kit REVIEW

Over the last 9 months we have been talking about building a 3-month supply as well as 72-hour kit. If you've been following the PLAN 9 steps created by the Southwest Utah Health Department, you've gone through ALL 9 steps in the last 9 months. Hooray!

Here's a review of the 9 steps!!!

Step 1: Water! It is recommended that we store a 2 week supply of water, which is 14 gallons per person.

Step 2: Food! There are lots of choices when it comes to food, but it's smart to store what your family will actually eat. In case of emergency, you don't want to make it more miserable by eating cardboard.

Step 3: Clothing! Having at least a set of clothing for each family member in your kit is great. You may also want to have a sweater and extra shoes.

Step 4: Medication! It's handy to have extra over the counter medications in case of evacualtion or just to have in case you run out at home. You also may have prescription meds that will are necessary to have on hand in case of an emergency.

Step 5: Flashlights! Having a couple flashlights with extra batteries will be necessary in more emergencies.

Step 6: Can Opener! I don't have a can opener in my 72-hour kit, because I don't have cans in my 72-hour kit, but because so much of my food storage is canned, I need spare can openers for my food storage.

Step 7: Radio! Having a battery operated radio may be necessary in case of an emergency. If something happened to the satelites and all the cell phones and the internet went down (AAHHH!!) radios may be the only way for communication.

Step 8: Toiletries! Items like soap, toothpaste, feminine products, diapers, etc. are an important addition to your 72-hour kit.

Step 9: First Aid Kit! You can put together your own first aid kit or buy one at the store. Either way, having the basic frist aid items is important.


So we've made it all the way through...but don't worry. We're just going to start over! If you have the items we talk about, you can rotate them or just pat yourself on the back!


Tuesday, September 25, 2012

Financial Emergency Fund

 
Image courtesy of U.S. Department of the Treasury


Having some cash on hand is an important part of any Emergency Plan. In case of an emergency that causes ATMs or credit card machines to go down, you will need cash to get yourself gas, food, transportation, etc.

Remember to have a variety of money, mostly smaller amounts because you never know if someone will be able to make change.

You may want to have a few hundred dollars in your Emergency Binder as well as some in your car.

In addition to having emergency cash, saving at least $1000 in a checking or savings account can help you have peace of mind in the event that you need new tires or another unexpected event. 

We recently were able to travel to Washington state to be with family after my husband's uncle passed away. This is the first trip in which we have not had to go into credit card debt. Of course, now we have to build up our savings. That is frustrating sometimes. But our kids were able to see their grandparents, 3 great-grandparents and lots of aunts, uncles and cousins who they may not have ever met otherwise.

It is recommended that we have 3-months of our family income in savings. But remember, just do one thing at a time.


So...let's review:

1. Have $100-200 CASH in your home and/or car. (Remember to have small increments: $1, $5, $10 and $20.)

2. Build up $1000 in checking or savings. (Or in cash, if you prefer.)

3. Save 3 months worth of your family income. (Make a goal, keep your budget and don't get discouraged!)

Tuesday, September 11, 2012

72-hour kit: First aid kit


Each 72-hour kit should include a basic first aid kit. There are small pre-made kits at the store or you can make your own.

Here are some basic items you could include:

Bandages, varying sizes
Alcohol wipes
Triple antibiotic cream
Non-prescription drugs
Gloves

Obivously there is about a hundred more things you could add. Just remember that SOMETHING is better than NOTHING, so get something small put together and add to it as needed.


Besides in your 72-hour kits, your car is an important place to have a first aid kit.


This is step 9 on the PLAN 9 pamphlet put together by the Southwest Utah Public Health Department.

Tuesday, August 28, 2012

Great Resources for Emergency Prep

Over the last few years, I have been impressed with the Emergency Preparedness information located on the St. George, Utah website. My mom is from there and told me about it.

Click HERE to go to the Emergency section of the website.

They have a list on the right of PDF files that have been put together.


Some of my favorites are:

Emergency Preparedness Guide which gives a great overview of what to do in an emergency from evacuation plans to turning off your natural gas.

Emergency Preparedness Calendar breaks down emergency prep goals into a few things to accomplish every month.

Utilities which gives you more in depth information on electricity, natural gas and water.

Smoke Detectors and Fire Extinguishers

First Aid- when to call 911, how to treat shock, etc.


With all the storms and fires we've had around the country this summer, these principles are becoming more and more important. But remember, don't get overwhelmed! Just pick one thing to work on.

You can do it!

Tuesday, August 14, 2012

72-hour kit: Toiletries


Having the basic hygiene items in an emergency can help to reduce the stress and possible illness due to an emergency.

Each family member should have:

1 bar of soap
1 toothbrush
1 tube toothpaste

If you have a baby, you will want to have diapers and wipes. Some members of your family will need feminine hygiene products as well.

Other items you may consider are:

Hand sanitizer and/or moist towelettes
Rolls of toilet paper
Shampoo
Lotion
Whatever you can't live without!


This is step 8 on the PLAN 9 pamphlet put together by the Southwest Utah Public Health Department.

Tuesday, July 10, 2012

72-hour kit: Radio


In case of a natural disaster or other emergency in your area, the only way to get information may be through a radio.

There are many different types of radios, from battery-powered to hand-crack radios. Whichever you prefer, make sure you know how to use it and have extra batteries if necessary.

This is step 7 on the PLAN 9 pamphlet put together by the Southwest Utah Public Health Department.

Tuesday, June 19, 2012

72-hour kit: Can Opener


As far as 72-hour kits go, I try not to pack any food that requires a can opener, so I personally do not need a can opener in my kit.

However, I think that it is VERY important to have an extra can opener available. So much of what we store is canned food, so it seems only practical to have an extra opener around...maybe even two.

A few weeks ago, our can opener died. The gear thing bent and it was toast...and it was Sunday...and I was in the middle of making dinner...and I needed a can of pineapple.

So off to the neighbors I went. It only took 4 doors til I found one. It was totally embarrassing.

The next day we went out and bought TWO can openers.


This is step 6 on the PLAN 9 pamphlet put together by the Southwest Utah Public Health Department.

See right side of blog for additional steps.

Tuesday, May 8, 2012

72-hour kit: Flashlights


Every 72-hour kit should include a flashlight AND batteries.

Do not keep the batteries in the flashlight while it is being stored.

Having head-lamp type flashlights are a great idea considering you may have your hands full in an emergency.

This is step 5 on the PLAN 9 pamphlet put together by the Southwest Utah Public Health Department.


See right side of blog for additional steps.

Tuesday, April 24, 2012

Emergency Prep Tips

Let's talk about some simple things that we can realistically do to make our homes more ready in case of an emergency.

-Have a PLAN!! There are lots of different situations to think about, but if you have a basic idea of what you will do, life will be that much easier. We have a plan on where to meet if there's a fire at your home. Our kids know that they need to run to one specific neighbor's house. That's part of our plan. If my husband is at work and can't be home, we have a meeting place planned. You might also want to talk to your child's school and ask them their emergency procedures. If there is a need to evacuate town, we will drive to my grandma's an hour south.

Your plan can be as simple as that.

-Have a portable 72-hour kit. Click on the links on the RIGHT of the page for more information.

-Know how to shut off your utilities. You need to know how to shut off your water, even in non-emergency situations.

I believe in most cases that the gas company will shut that off if their is a natural disaster, but you may want to call and find out for sure.

We live near an Interstate and if their was a chemical spill from a wrecked semi-truck, there may be a need to shut off items in your home that may caught fire like your water heater or furnace.

-Protect important documents. This could be as simple as using a fire-proof safe, or having an easy to grab Emergency Binder. You may want to make copies and give them to a relative in the event the originals are destroyed.

-Have a "Car kit." I don't have an actually kit in my car, but there are several items throughout my car that will be of use in an emergency. These items may include the following: Blankets, flashlights and batteries, high-energy foods like protein bars, extra clothing, jumper cables, first aid kit, water, small shovel, extra diapers and wipes, etc.

I have used all of these items, except the shovel, in my every day situations as well, so it's good to be prepared for whatever...not only disasters.

-30-day supply of medications. We've talked about 72-hour supply of medication, but depending on the severity of your medical situation, you may want to have a month's worth in your home. You most likely will have to get permission from your doctor and/or insurance company to do this.

-Know how to provide your own lighting, heating and cooking if the power goes out. In most natural disasters, the power is the first thing that goes. I also believe that it is one of the first things to get back into operation, but you may have a few days (or more) at home when you will need to do without. Flashlights are best for light. If you use candles or lanterns, remember to have adequate ventilation. If you have a grill, you can have extra propane or charcoal on hand.

-In conjunction with that, you might want to have a fire extinguisher on hand. I finally went to the store to look at one last summer, and the small ones they make for cars are about $12. Not bad.

-Lastly...my favorite...ALWAYS have at least HALF of a tank of gas in your vehicle!!! With gas prices, if feels better to get a little bit at a time...at least I think so. Also, if I have more than half a tank, I can get to my grandma's house or possibly my parents' house without stopping for gas. You may also want to always have gas in a gas can as well.

Tuesday, April 10, 2012

72-hour kit: Medication


Medicine is an important part of any emergency kit. Storing over-the-counter medications like Acetaminophen and Ibuprofen may be useful if you are away from home or if you are unable to go to a store for a period of time. If you have children at home, you should store appropiate medicine for them as well.

I store a bottle of each medicine in my kit. When I run out of one in my medicine cupboard, I get the bottle out of my kit. Then I buy a new one for the 72-hour kit. It has been helpful to have these extra medicines handy when I am unexpectedly run out and one of my kids is sick.

If you or a family member has a specific medical need that makes it necessary to take medication regularly, this medication is extremely important to have an emergency. My husband takes medicine weekly, along with daily vitamins. I store at least 3 days worth of the needed medication, one week's worth for the weekly meds. You may need to have a plan for medications that need to be refrigerated, if needed.

I use an old medicine bottle with a child-proof lid for the pills we need to keep my kids safe. I also have a card with each medicine and vitamin labeled.


I place the medicine in a small plastic bag, wrap it with packing tape, and label it with the date so I know when I need to rotate it.

This medication has also come in handy when we have had miscommunication between the doctor's office and the pharmacy.


This is step 4 on the PLAN 9 pamphlet put together by the Southwest Utah Public Health Department.


Previous Steps...
Step 3: Clothing
Step 2: Food
Step 1: Water


Wednesday, March 28, 2012

Emergency Binder

(Beautiful, right? It looks like a Trapper Keeper.)

So a year or two ago I started following the website, Food Storage Made Easy. It's a fun site with some great tips on getting your food storage and emergency preparedness stuff going. My favorite thing I've learned from that website is the Emergency Binder. I used their list as a guideline and went from there.

Here's their list:
-Birth certificates
-Passports
-SS Cards
-Copies of credit cards, front and back
-Homeowners insurance policy
-Auto insurance policy
-Life insurance policy
-Retirement statements
-Internet passwords
-Immunization records
-Utility statements
-Work/tax documents that would be difficult to replace
-Cash, keep a variety of small bills on hand

So here's what I have:
-Contact info. I have our parents, local family, friends, emergency numbers, doctor's numbers and where we would meet in case of emergency, like a church or school.
-Account info. Anything with an account number basically. I have our account numbers, phone numbers and addresses of the company. This includes utilities (so I don't have to keep a statement in the binder) credit cards, student loans, whatever. It's basically a brief summary of all accounts and important numbers.
-Internet passwords. I know, it's a little scary in a way, but you have to have them somewhere. If I died, my husband would have no clue about half our bills, so at least he'd have all the passwords so he could see what's up. :)
-Important certificates. Birth, marriage, car title, social security cards, immunization cards, etc. I even have my old passport and my vision rx as shown below. (Don't worry. I blurred out some of the info.)
Each member of the family has their own sheet protector, so when I went to Kindergarten registration I only had to grab the sheet protector and everything the school needed was there. Easy.
-Insurance stuff. I have the declaration page for our homeowners insurance, our auto insurance and our extra medical insurance cards.
-Taxes. I keep the last two years worth of tax stuff. The W2s are in sheet protectors. Last year itemizing actually helped, so this year I am also keeping receipts and note to remind me of our deductions so I'm not scrambling at tax time. It's also good to have an extra copy of your return. Oh, I have our property tax stuff in there too.
-Loans. Curse them. I have the statements and any important notices from our student loans including notes from conversations with people so I know what I'm talking about next time.
-401K and stocks. Yes, we have both, although they are sad. We put a tiny bit in a 401K through my husband's work so we have that quarterly statement. I also keep our stock statement. Just so you know, we put a little bit in RIGHT before everything went crazy so we currently have $3.38. Be jealous.
-Mortgage statements and any other info from our lender. Behind these I have our Title insurance.
-Paystubs. My husband's are online now, but I make a tiny bit from coordinating the daycare at a local gym so my last few paystubs are in a sheet protector. I should probably print out a few of Silas's, just in case.
-Random stuff: purchase agreement from our car including warranty information, warranty info on our washer and dryer (which I just purchased and it made me feel like a big girl. I usually hate spending money on warranties, but our machines getting older and I use them CONSTANTLY), print out from our credit reports, and stuff about our alarm system (that's a long story).
-Cash. Honestly, I think this is probably THE MOST IMPORTANT part of the binder, but I don't normally have more than a few dollars. I need to work on that. What if no ATMs or card readers were working? People probably won't take a check if that was the case, so cash is important.
Oh and I got a pretty purple binder so it would be easy to grab if we were panicing. And no, I don't have it sitting out for all to see. Don't worry.

Don't get overwhelmed. Just do one thing at a time. You will feel so good when it's done.

NEXT POST: 3-month supply: Milk

Tuesday, March 13, 2012

72-hour kit: Clothing


As far as clothing goes this is what I recommend for EACH family member:

1 shirt
1 pair of jeans (I use old, holey ones)
1 pair socks
1 pair of underwear (or 12-16 diapers for baby...and don't forget wipes!)
1 sweater
1 pair shoes

You can get clothing from your local thrift store. I save ALL my boys' clothes, so most of the stuff is used from their older brother. For my daughter, I have some pajamas that are the size bigger than she is currently in.

In the image above, I had all the clothing in a large, rolling suitcase. Since I took that photo, I have made separate kits for each member of the family. Do what works for you.

I also have a set of clothing in the car for each of my children, as well as a bunch of diapers and wipes. There have been MANY times that I have needed a new pair of underwear and pants for one of my kids who got in mud or had an accident while at a friend's house or even out doing errands.


While you're thinking of clothing for you 72-hour kits, you may want to consider the following items as well:

Ponchos
Blankets
Work gloves
Hats

This is Step 3 on the PLAN 9 pamphlet put together by the Southwest Utah Public Health Department.

Previous Steps...
Step 2: Food
Step 1: Water

Tuesday, February 14, 2012

72-hour kit: Food


For years, I have been looking at lists and lists of what food should be in a 72-hour kit. I'm sick of it. I have finally come to the conclusion that for our 72-hour kits, we will have the lightest food we can.

Here's what I have:
1 tuna salad snack
1 Mylar package of tuna
1 box raisins
1 packet of powdered drink mix, the size that fits in a water bottle
1-2 package ramen noodles
2 packs instant oatmeal
1 protein bar
1 cheese cracker snack
1 fruit snack
2 spoons
A few hard candies
(I have a Pasta Sides in the photo, but I took it out of my kit because you need butter and milk for it.)

I also have 1 fruit melts package for our 1 year old.

I want to add next time:
1 small package beef jerky or beef sticks
1 fruit melts or dried fruit

As you can see, I store my food in a gallon-sized freezer bag. I also have my water purifiers in each kit.

OK, so I also have a jar of peanut butter and some Vienna saugages in my kit, just in case. I also have bowls in my bag, but may put one in each kit next time I rotate.

I used to rotate my food every 6 months, but some of the items I added this time expire in June so I am going to rotate this every 4 months. The kids enjoyed eating the things I took out, so if I rotate the food more often, it will be more fun and more tasty.

Hope the ideas help, but remember, do what works for you and your family. Any amount of food will be helpful if you have to take off and not be able to shop for a few days. You could honestly just pack a few protein bars for everyone for now, just to have something.


This is Step 2 on the PLAN 9 pamphlet put together by the Southwest Utah Public Health Department.

(Step 6 from PLAN 9 is "Can Opener" but I don't pack food that needs a can opener, so I skip this step.)

If you missed Step 1, click HERE.

We will be going through the rest of the steps over the next few months. If you follow along, you can have a complete 72-hour kit by September!

Next week's post: Debt